Step 1: Prepare for Efficiency
Before splitting your model, optimize it for large-scale printing to save material and time.
-
Hollow it out: Large sculptures do not need to be solid. Set a wall thickness of 2-3mm to save filament or resin.
-
Add Drainage Holes: Essential for resin prints to prevent trapped liquid and internal pressure.
-
Export & Upload: Once ready, export as STL and head to MegaSlicer Pro.
Step 2: Automated Slicing & Keying
Splitting a large model manually can take hours. Our tool at MegaSlicer Pro handles the complex math for you.
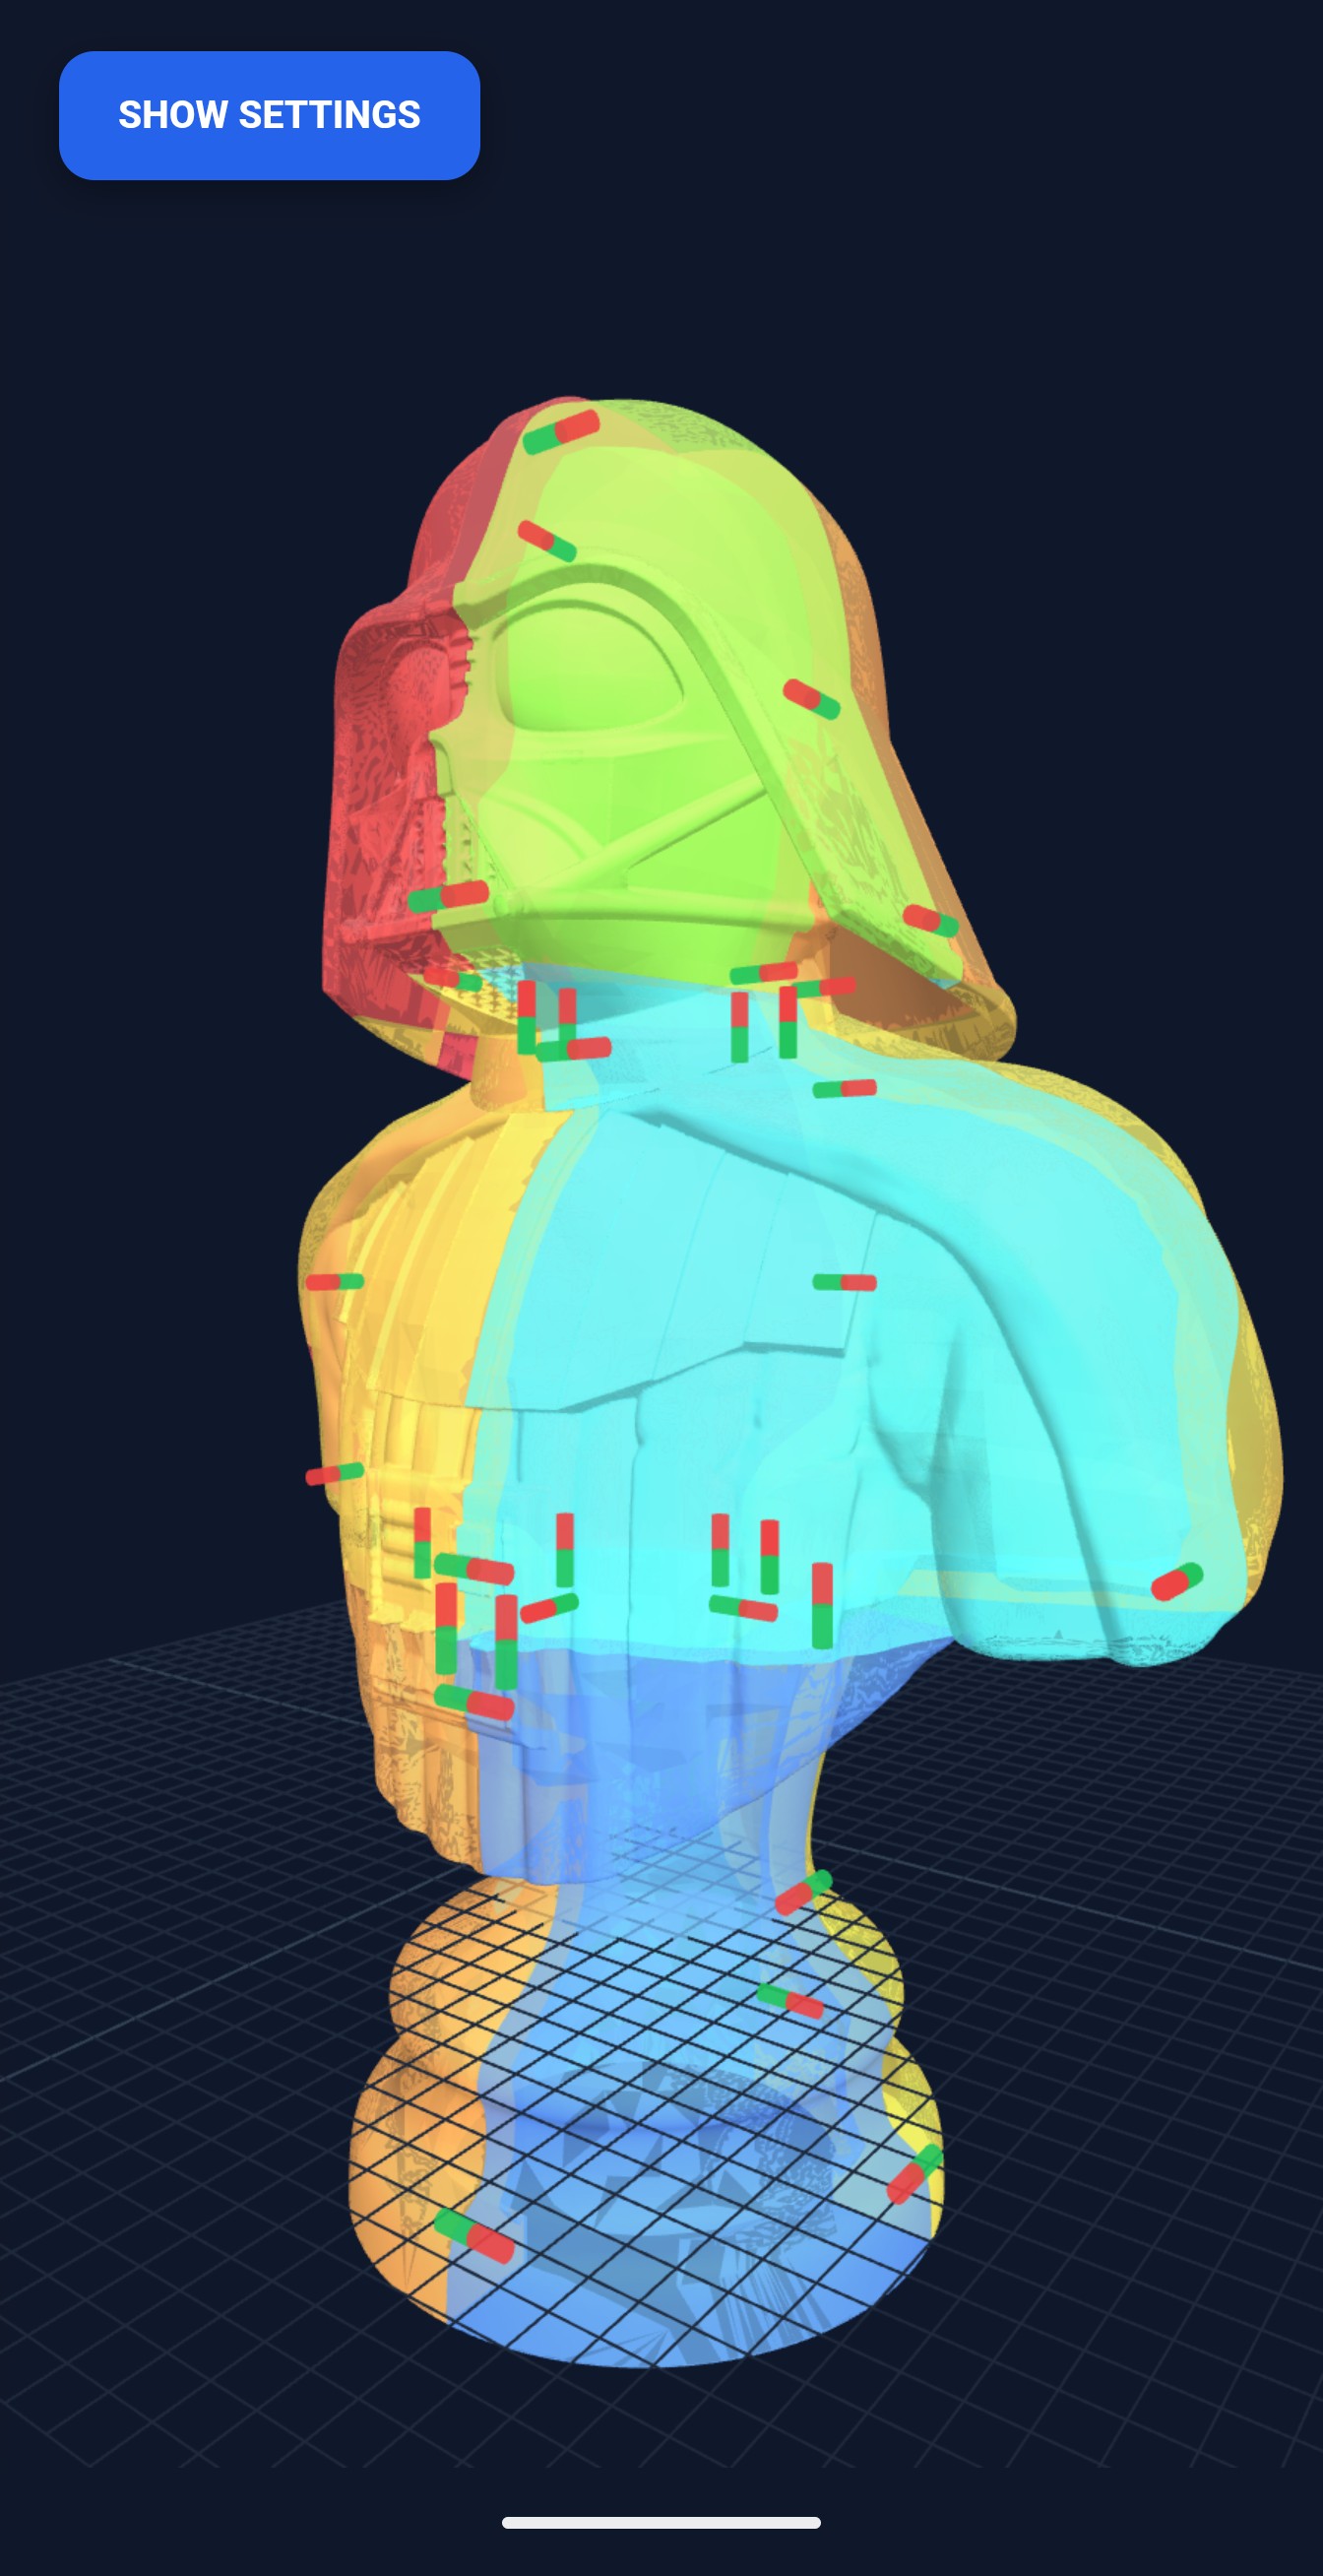
Intelligent Segmentation & Pin Placement (Vader Bust Sample)
Intelligent Slicing
The software calculates the optimal cut lines to fit your specific printer's build volume while maintaining structural integrity.
Alignment Keys
Automatically generated male and female pins ensure that parts lock into the exact correct position during assembly.
Tool Comparison: Mega Slicer vs. Blender/Meshmixer
Many users ask about splitting STL in blender/meshmixer. While these tools are powerful, they have a steep learning curve.
| Feature | Blender / Meshmixer | Mega Slicer Pro |
|---|---|---|
| Learning Curve | Steep (Professional 3D tools) | Beginner Friendly |
| Splitting Process | Manual Plane Cuts | Automated Grid / Auto-Keys |
| Focus | General 3D Modeling | Dedicated STL Splitting |
Technical: STL Segmentation for Large Prints
STL segmentation for large prints involves more than just cutting a model. Structural integrity is key.
- Load Distribution: Avoid placing cuts at the weakest points (e.g., ankles of a statue).
- Tolerance: Ensure your printer's tolerance matches the key/pin clearance (usually 0.2mm - 0.5mm).
- Orientation: Print split parts with the flat cut surface on the bed to minimize supports.
Step 3: The Invisible Seam
Joining large parts requires a combination of speed for alignment and chemistry for strength.
The "Tack" (Super Glue)
Use CA glue on the alignment pins with an activator spray for an instant lock.
The "Anchor" (Epoxy)
Apply two-part epoxy to main surfaces for heavy-duty structural bonding.
The "Finish" (Filler)
Fill seam lines with wood filler or UV resin, then sand flush for a smooth surface.
Step 4: Painting & Finishing
To achieve a professional look, you must unify the surface texture.
// Pro Tip
Use "Filler Primer" from automotive stores. It's thicker than standard primer and helps hide tiny layer lines and sanding marks in one pass.